Posts

Home of the Roadwing Harness

Image
Roadwing Electrical Harness Hi I'm Gonzo! Godfather of the Roadwing, a Honda Goldwing GL1800 rear shock with an electric over hydraulic preload adjustment, modified to fit the under sprung Road Star 1700. Here is the place to learn more about the electrical harness you need to make it all work. I am the sole provider of this harness though I provided the wiring diagram years ago for those of you that want to make your own. Refer to Tykes page for the original write-up at : https://tykesplace.com/yamaha-roadstar/roadwing/ There are probably over 600 Road Stars converted to this shock now. It is a 200lb increase over stock spring rate coupled with Honda's premiere bike's top of the line actuator. Your bike will handle like its on rails once you've completed the install, and being able to adjust the preload at the flick of a switch is miles better than jacking up your bike and making 1/4" turns of a nut when you add a passenger or gear. No more frame ba

Road Star Batwing Harness

Image
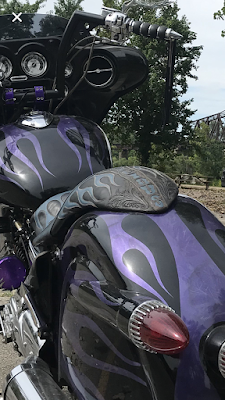
Gonzo's Batwing Interconnect Harness for Road Stars So you want to put a full batwing inner and outer fairing on your bike, but you're not sure about the wiring. Let me make it easy for you... My Batwing Interconnect harness will plug into the stock two plugs that went to your tank mounted speedo and will provide all the functions to your dash indicator panel like (separate) left and right turns, oil (engine) lamp, high beam indicator, and neutral. The HD dash indicator panel comes in different configurations, LED or little bulbs, and the connector size changes. Before procuring this harness, procure the indicator you wish to use or let me get it and send it tp you all at once. My harness will provide pigtails to connect your new gauges to and will be labeled as such.  I will need to know which gauges you are using. I used SpeedHut gauges like these which are configurable for color, needles et al. Refer to SpeedHut.com. The Batwing Interconnect Harn

Honda Shadow Electrical Light Harnesses

Image
Honda Harnesses Lets face it, we love our Hondas. I bought my Shadow 1100 in 02 and its now 2020. I have had a plethora of other bikes come and go but still have my Shadow. They have their issues and one I help eleiminate is the dead start button issue. You see, Honda put the headlight circuit through the start button. When its not pressed, it runs the headlamp. When pressed, it disconnects the headlamp and diverts all the battery to starting the bike. Ingenious, right? But the small copper contact is help in place with plastic, plastic that gets hot when the headlamp runs and glazes over the start contacts.  In addition, when people add lightbars and accessories to their bike, the first thing they think of is to tie it to their headlamp so it comes on with the key. So you're running 4.5 amps through that small copper contact running a 55W headlamp at 12Vdc,  and now adding two 35 or 55 Watt running lamps for an addition 6-9Amps. That switch doesn't stand a chance. You p

Road Star HD Bag Install

Image
Road Star HD Bag Install This is a look at the way I mounted my HD bags on my Road Star. They are very solidly mounted and as close in as I could get and have them match side to side. First I used steel pipe and slit the ends. Then inserted some flat stock that were drilled to fit the frame holes. Welded Mounted these on the bike. I bought these HD hoops that fit into the lower ridge under the bags. I cut the ends off and welded them to a cross bar that bolted to the frame. The finished hoops on the bike. On the HD loops, I didn't use the fat rubber bushings that pop into the bottom of the bags. Instead I used EPDM rubber tape under the bags and drilled and tapped 1/4-20 threads into the holes in the hoop to bolt the bags down from the inside. Sits them down lower. Painted black. Bags on the bike. As she sets today with a trunk. Ultra Star.  This is how I lit everything up.